Do you know How to Make a Diorama Out of a Shoe Box? Creating a diorama from a shoe box is a fun and creative way to explore your imagination! You can design and construct your miniature world with just a few materials. In this article, we’ll guide you step-by-step through making a diorama from a shoe box. You’ll learn all the necessary tips and tricks to make your diorama project successful.
Key Takeaways:
- Creating a shoe box diorama is a fun and creative project for all ages.
- Before starting your project, gather all the necessary supplies and materials, including a shoe box, a craft knife, and art supplies.
- Choosing a theme for your diorama is essential, as it will influence the design and composition of the project.
- Construct the diorama scene using various materials to create diverse elements.
- Enhance the diorama by adding details and finishing touches like painting, texturing, and realistic elements.
- Remember to troubleshoot common challenges that may arise during the process and seek inspiration for future projects!
Gathering Supplies and Materials
Before starting your shoe box diorama project, gathering all the necessary supplies and materials is essential. You may already have some of these at home, while others may require visiting your local craft store. Here’s a list of items you’ll need, along with some optional materials to consider:
| Essential Supplies | Optional Materials |
|---|---|
|
|
Additional Tips
When selecting materials, consider the theme of your diorama and the overall look you want to achieve. You may also want to experiment with different textures and colors for added visual interest. Feel free to get creative and think outside the box (or shoe box, in this case)!
Choosing a Theme and Planning the Diorama
Before starting your shoe box diorama project, deciding on a theme for your scene is essential. This will help guide your planning and design choices to create a cohesive and visually appealing diorama. Choosing a theme can seem daunting, but there are several ways to brainstorm creative ideas.
Brainstorming Ideas
One way to brainstorm diorama ideas is to consider your interests and hobbies. Are you interested in history, nature, or science fiction? These can all be great starting points for creating a diorama scene. You could also consider a special memory or moment from your life or even recreate a favorite book or movie scene.
Another fun way to gather ideas is to browse online for inspiration. Pinterest, Instagram, and YouTube are excellent sources for diorama ideas and tutorials. You can also visit museums, art galleries, or even toy stores to get ideas and see examples of dioramas.
Planning the Layout
Once you’ve chosen a theme, the next step is to plan the layout and composition of your shoebox diorama. Begin by creating a rough sketch of the scene, indicating the placement of various elements. Consider the viewer’s perspective and how the location will be viewed from different angles.
Think about the different layers of the scene, such as the foreground, middle ground, and background. This can add depth and interest to your diorama. Consider adding lighting or other special effects to enhance the scene.
By taking the time to choose a theme and plan the layout of your shoe box diorama, you’ll be well on your way to creating a unique and impressive project.
Preparing the Shoe Box
Before beginning the construction of your diorama, you will need to prepare the shoe box. This process involves cleaning the crate, reinforcing its structure, and creating a base or background for your scene.
To start:
- Remove any stickers or labels from the shoe box.
- If any adhesive residue is left behind, use rubbing alcohol or adhesive remover to clean it off.
- Reinforce the structure of the box by applying duct tape to all the inside edges and corners. This will ensure the box stays sturdy and doesn’t collapse under the weight of the added materials.
Create a cardboard base to fit the box’s width and depth. This cardboard can serve as the diorama’s base and be painted or covered with fabric, paper, and other materials to create the desired effect.
Finally, if you plan on adding lighting to your diorama, now is the time to cut out any necessary windows or openings in the box for the lights to shine.
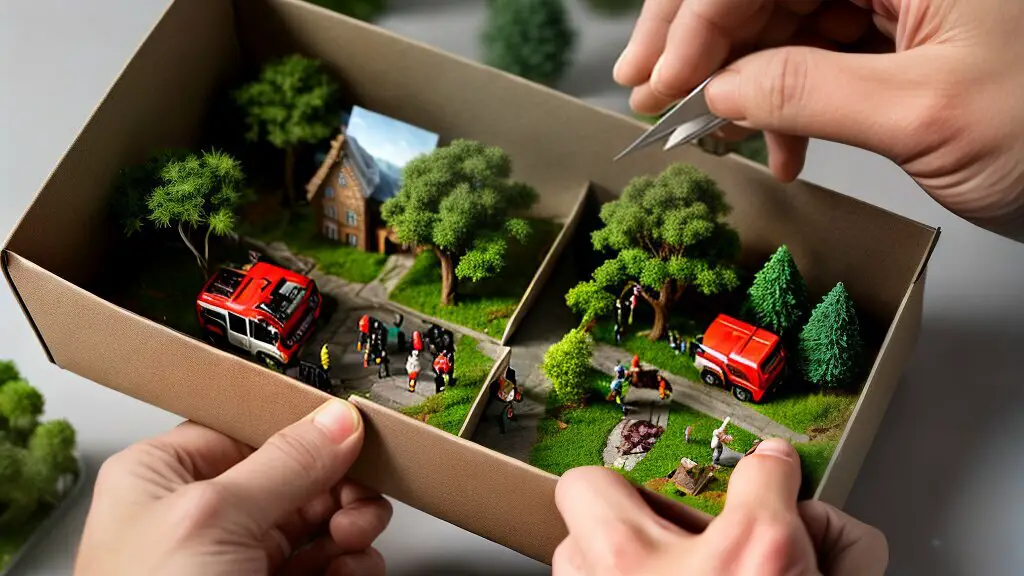
Creating the Diorama Scene
Once you have prepared your shoe box, it is time to start constructing the diorama scene. This stage can be exciting and challenging but gratifying with the right approach.
Gather Your Materials
Before you start building, gather all the materials you will need. Depending on your chosen theme, this can include anything from paper and clay to miniature objects and paint.
Once you have all your materials, it’s time to start creating!
Construct Your Elements
Begin by creating the elements of your diorama scene. This can include mountains, trees, buildings, or other theme features. Use materials such as clay to create textures and shapes or paper to cut out flat shapes and layer them for a 3D effect.
Arrange Your Scene
Once you have created your elements, arrange them within your shoe box to make your scene. Experiment with different layouts and perspectives to find the most visually appealing composition. When creating a design, it’s essential to carefully consider the placement of each element to ensure a cohesive and balanced result.
Add Final Details
After arranging your scene, add the final details to bring it to life. Enhance the scene by adding color, texture, and small objects or figurines with paint or markers.
Creating a diorama scene can be a fun and creative process. You can bring your ideas to life in a shoe box with suitable materials and techniques. The next step is to add extra details and enhancements to your diorama.
Adding Details and Enhancements
Once you’ve created the main components of your diorama scene, it’s time to add some extra details and enhancements to make it pop. Here are some tips and techniques to consider:
- Painting: Adding some color to your diorama can bring it to life. Use acrylic paints to add depth and shading to your landscape or buildings. You can also use paint to add small details like windows, doors, or signage.
- Texturing: To create a more realistic and natural effect, use various materials to add texture to your scene. Use sand, moss, or small rocks to create terrain features like hills or cliffs. You can also use different fabrics or papers to create textures on buildings or costumes.
- Miniature objects: Adding small things like furniture, vehicles, or people can add great interest and detail to your diorama. Look for tiny objects at crafts stores or online, or make your own using clay or paper.
- Vegetation: Adding plants or trees can make your scene look more natural and realistic. Consider using moss, dried leaves, or small plastic plants to create foliage in your diorama.
- Water effects: If your scene involves water, you can use various materials to achieve different results. Consider using clear resin or glass beads for a calm or still water effect. Add small waves or ripples using a clear gel or glue for a more active or choppy water effect.
Remember, the key to adding details and enhancements is to be creative and experiment with different materials and techniques. Don’t be afraid to try something new!
Finishing Touches and Presentation
Once you have completed your shoe box diorama, it’s time to add the finishing touches and present it in a way that showcases all your hard work. Consider the following tips:
- Take a step back: Before finalizing your diorama, take a step back and view it from different angles to make sure everything is in its place.
- Add details: Small details such as signs, flowers, or people can add a realistic touch to your diorama.
- Experiment with lighting: Lighting can affect the mood and atmosphere of your diorama.Experiment with various lighting methods to determine the most effective approach for your setting.
- Frame it: Consider framing your shoe box diorama to give it a professional look and protect it from damage.
Adding these final touches can make your diorama stand out and impress your audience.
Tips for Success and Troubleshooting
Creating a diorama using a shoe box can be both enjoyable and challenging. Here are some tips to help you achieve success:
- Think about lighting: Consider the placement of your diorama about a light source and experiment with different types of lighting to enhance the scene.
- Use perspective: Give your diorama depth using techniques like scale, color, and overlapping objects to create the illusion of distance.
- Coordinate colors: When creating a diorama, selecting colors that complement each other and align with the theme is essential. Avoid using clashing colors that can be distracting.
- Practice textures: Experiment with different materials to add texture to your diorama, such as sand for a beach scene or cotton balls for clouds.
- Don’t rush: Take time and work carefully, especially when creating small details or intricate pieces.
If you encounter any issues during the diorama-making process, don’t worry! Here are some common challenges and ways to troubleshoot them:
| Challenge | Solution |
|---|---|
| The diorama looks too cluttered | Remove unnecessary elements and simplify the scene. Consider rearranging the remaining ingredients to create a better composition. |
| The structure is not sturdy enough. | Use additional materials like cardboard or hot glue to reinforce the structure of the shoe box. Make sure to let any adhesive dry before continuing. |
| The colors are too dull or too bright. | Adjust the lighting or consider repainting elements to suit the color scheme better. You can also experiment with shading or highlighting to add depth and dimension. |
Remember, the most critical aspect of creating a shoe box diorama is to have fun and let your creativity shine. Don’t be afraid to try new ideas and make something truly unique!
Conclusion
In conclusion, making a diorama out of a shoe box can be a fun and rewarding DIY project. This article thoroughly examined the crucial supplies and materials required for constructing a shoebox diorama, emphasizing the significance of carefully choosing a theme and strategically mapping out the design.
You can transform a simple shoe box into a stunning visual display with creativity and imagination. Remember to take your time, experiment with different materials, and enjoy the process.
Get Inspired!
If this tutorial inspires you and you want to create your shoe box diorama, countless resources are online to help get you started. From Pinterest boards and YouTube tutorials to Instagram hashtags and DIY blogs, there’s no shortage of inspiration and ideas to spark your creativity.
So why not gather supplies, pick a theme, and dive into your shoebox diorama project? There are infinite possibilities, and the only boundary is your creativity.

I’m Telma Janda, and I bring experience in store management, storekeeping, and interior decor to the table. Hailing from the Lone Star State of Texas, USA, I’ve spent years delving into the intricacies of organizing spaces and making them functional and visually appealing.
Having managed various stores and honed my skills as a meticulous storekeeper, I understand the nitty-gritty of space optimization and inventory control like the back of my hand. My journey through the world of interior decor has given me a keen eye for arranging spaces in aesthetically pleasing and practical ways.
Through my writings, I share actionable tips and insights on BestStorageBoxes.com to help you master the art of effective storage and enhance your living spaces. From decluttering to creating stylish storage solutions, I’ve got you covered. So, let’s embark on this journey together and transform how you manage your spaces.
Stay organized
Telma Janda